Sitewide Search
What's new.../ Gallery
- 28 Dec 2012
1972 Stock Westy - 27 Nov 2012
Gareth's 21 Window Samba - 20 Nov 2012
The Beast Is Back ! - RSS Feed

- More >>>
More Info
How to...
Projects
Gallery/Resources
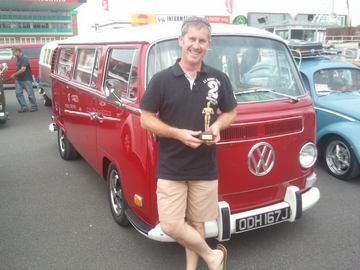
Mr Bright side the 1971 Sunroof Deluxeposted on 19 September 2010 | posted in Mr Brightside the 1971 Sunroof Deluxe | ( 16 ) CommentsHere is Mr Bright side and is booked in for a full body bare metal restoration and will be finished in Chianti red with a white roof. 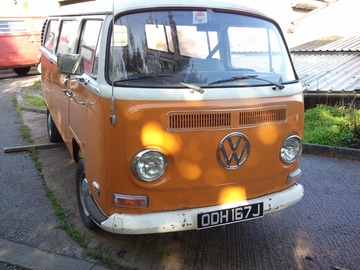 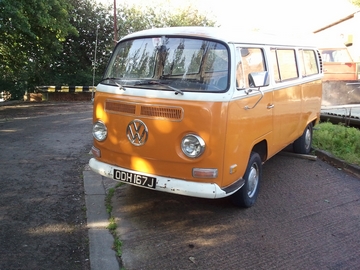 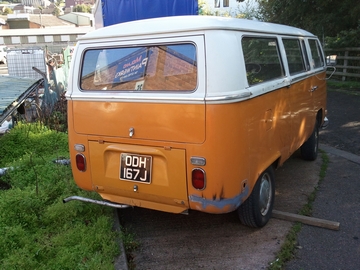  Stripping Started 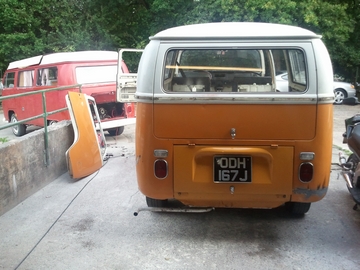 Windows out 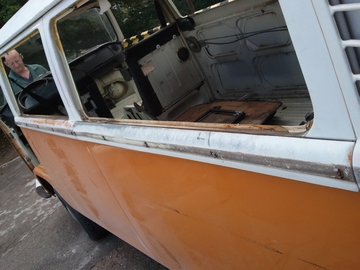 Rust to be dealt with 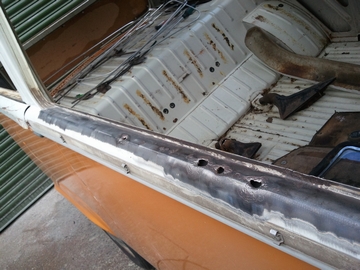 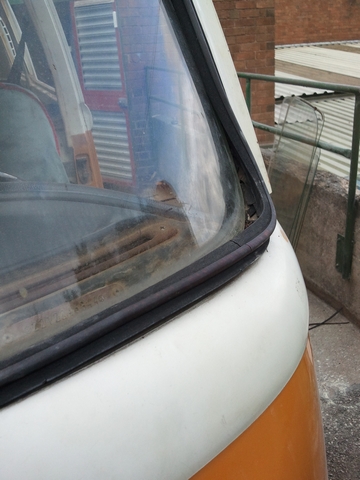 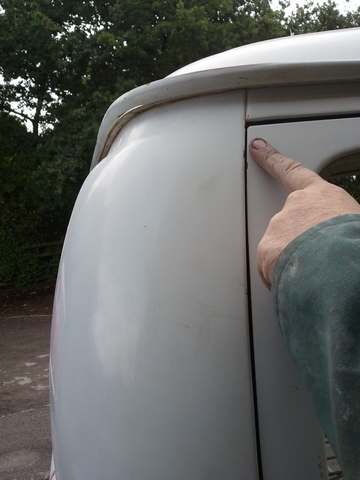 Dirt under the screen but when removed it seems pretty sound  Rust on the front floors awaiting attention 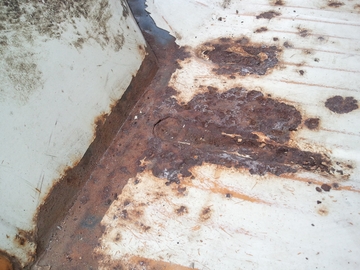 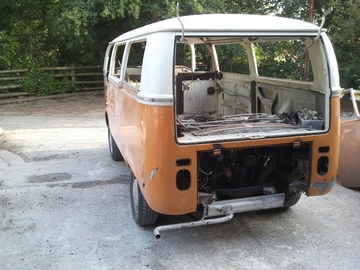 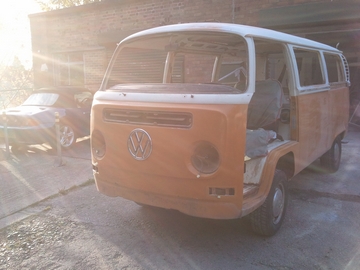 Signs of previous accident damage where a slide hammer has been used 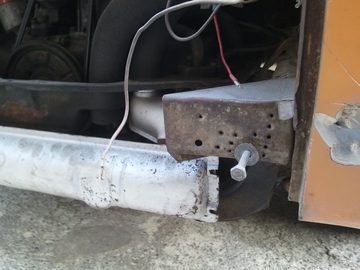 Doors Bare metaled 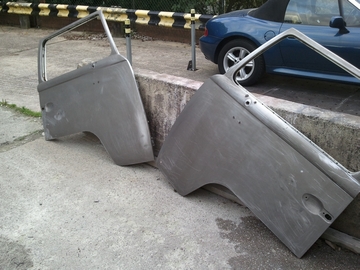 Engine lid stripped and to our amazement found corrosion underneath the sound paint, this just shows what maybe lurking underneath dry Californian paint 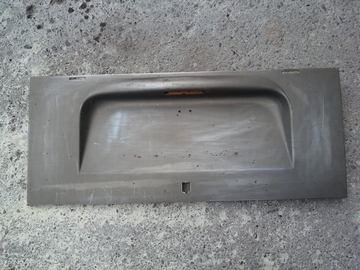 Here are more signs of accident damage 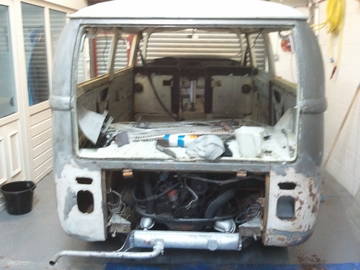 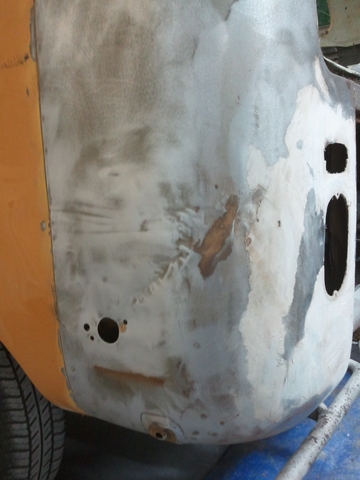 Here there has been a battery tray added to this rotten corner 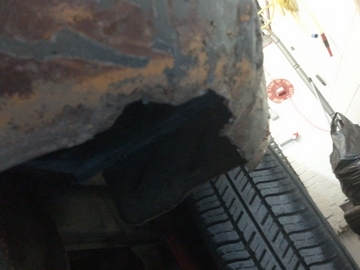 Inside the nearside corner, the battery tray has folded up from the corner in a previous accident 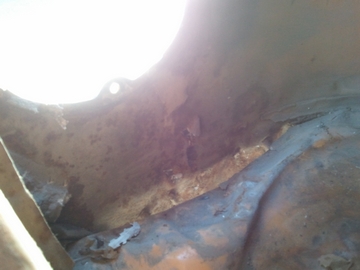 Van is now bare metaled 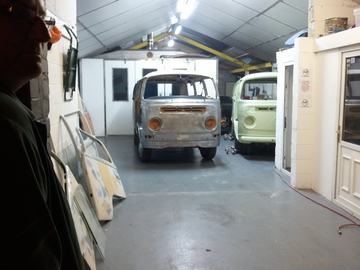 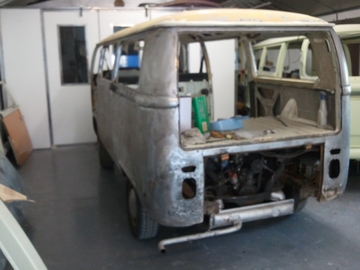 Previous damage with filler removed 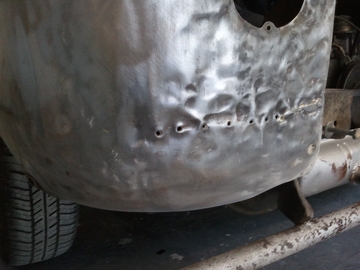 Sunroof removed and roof flatted 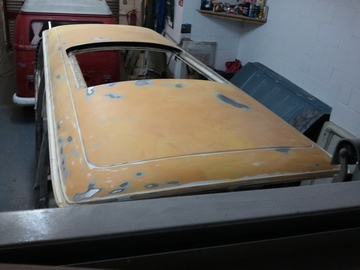 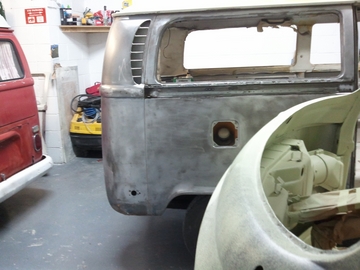 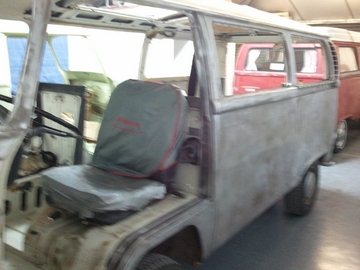 Steam cleaned inside, in the engine bay and underneath. 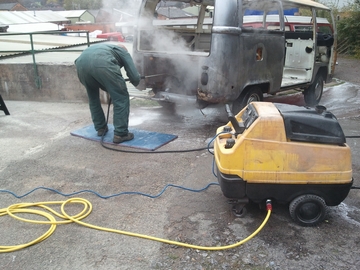 looking better without the sand, oil and grease! 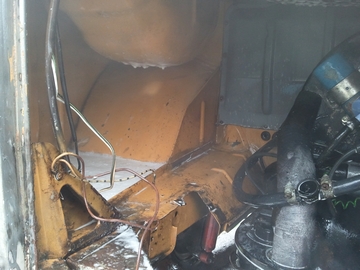 Old Rear corner cut out. 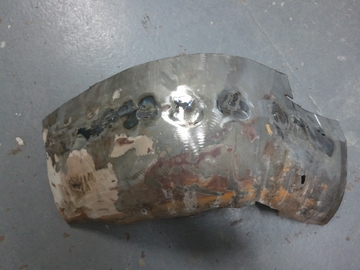 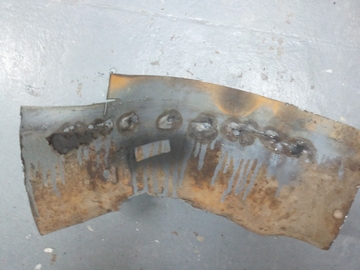 New one cut to shape 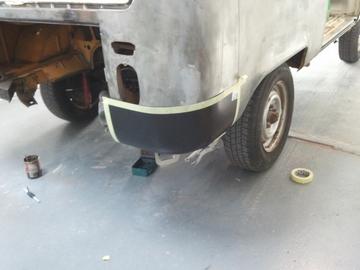 A few highs and lows dealt with first 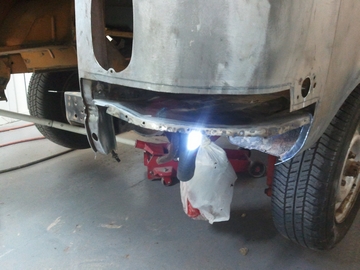 corner clamped up to get the reflector holes correct 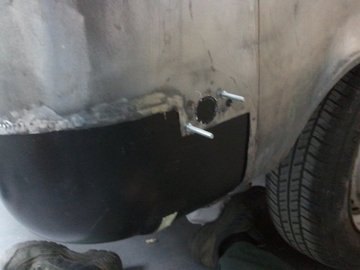 We managed to save the battery tray, clean it up and coated it with a zinc primer. We had to fold a return edge on the edge for the engine lid seal as the previous accident had squashed it too much. 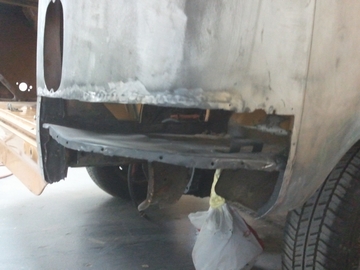 sitched in place 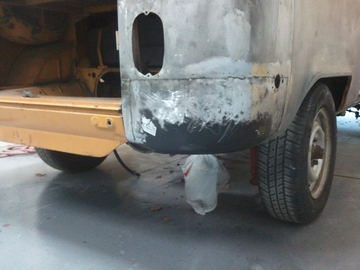 Floor cut out  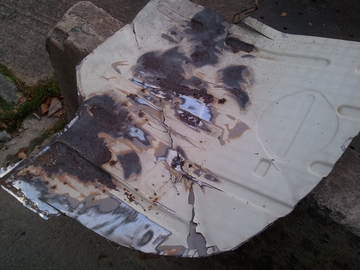 here we found a bit of rot and dealt with this first 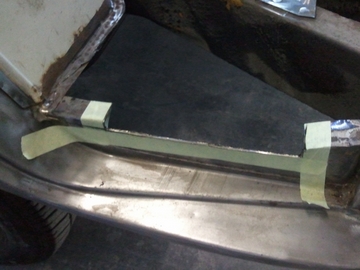 New piece folded and welded in  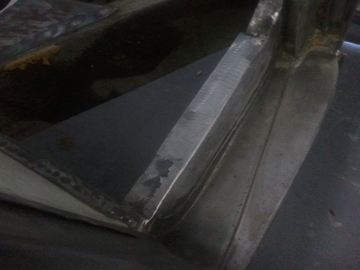 Centre floor section started too 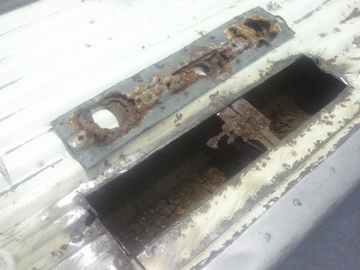 Repair panel welded and seam sealed  Bare shell phosphated and baked prior to any coating 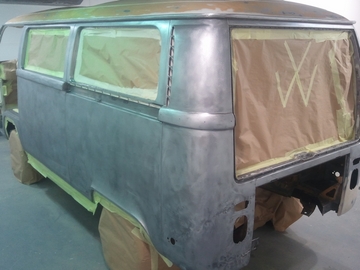 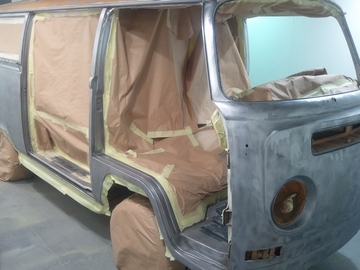 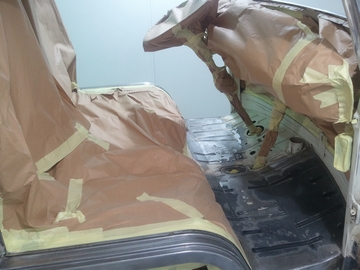 Here is the Epoxy primer which is sinkage free and a very high moisture proof anti-corrosive barrier. Now the shell is locked down,we dont have to worry about flash or long term rust. 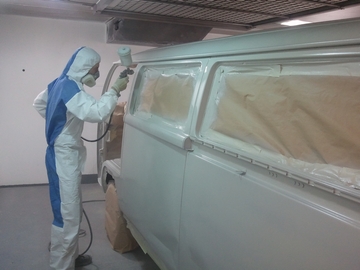 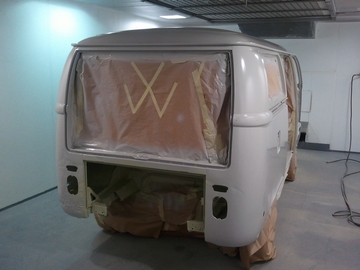 Body repairs now awaiting attention 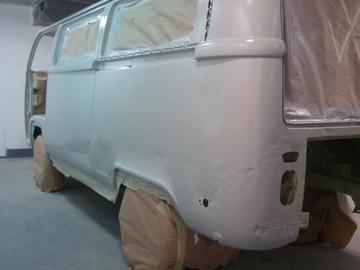 Engine bay and floor painted with epoxy and followed with 2k primer 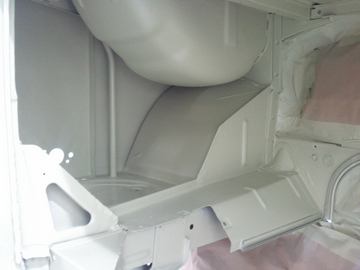 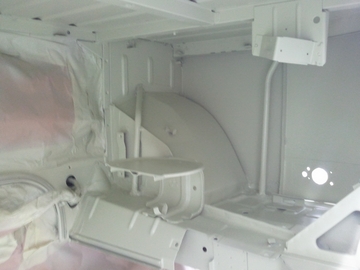 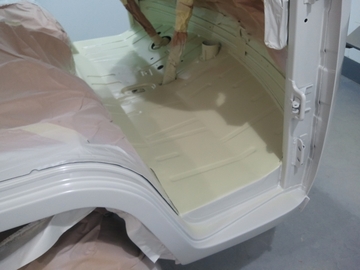 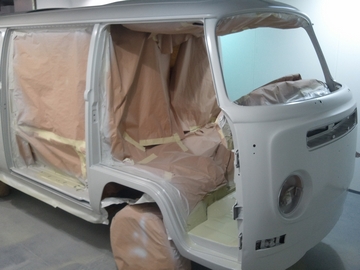 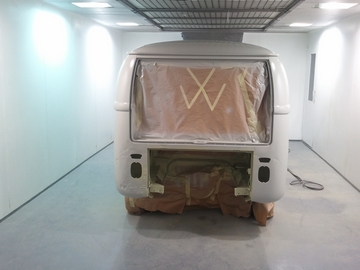 Now the Fun starts ! 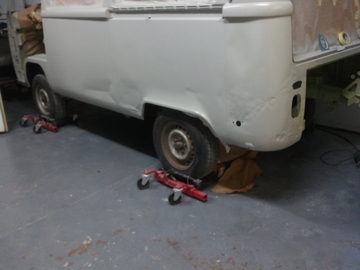 Here we have been going around the van with a tekna spotter pulling out the accident damage, dents and heat shrinking the metal to put the strength back in. After this process minimal filler will be required as apposed to slabbing it in as thick as cement.  The black areas are the inside of the dent 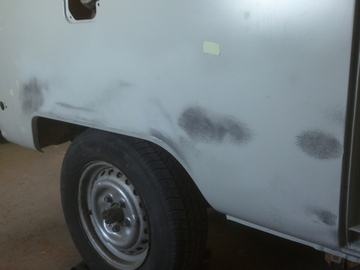 In total We have used over 500 studs! 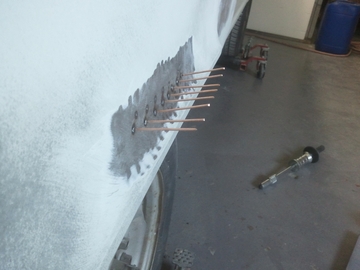 After, Before filler 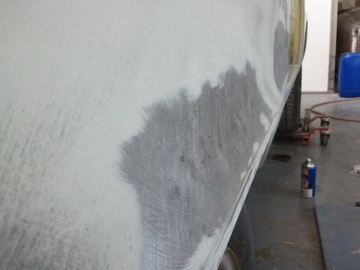 Now very level and strong. 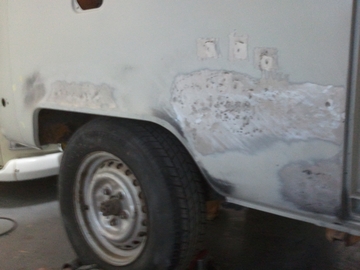 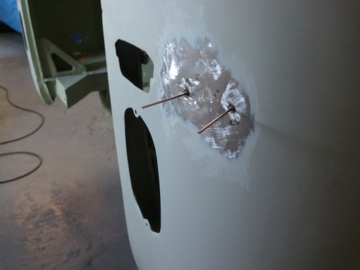 This top crease was very weak and was popping in and out. 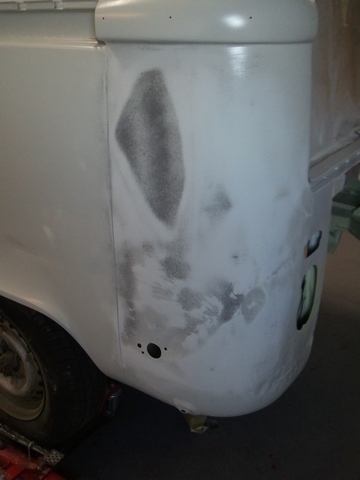 Heat shrunk and probably stronger than when new 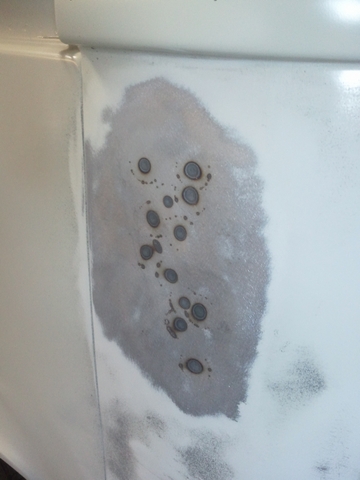 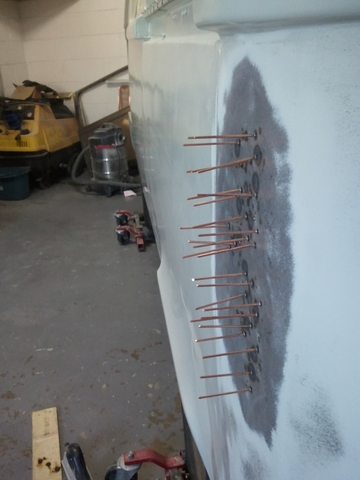 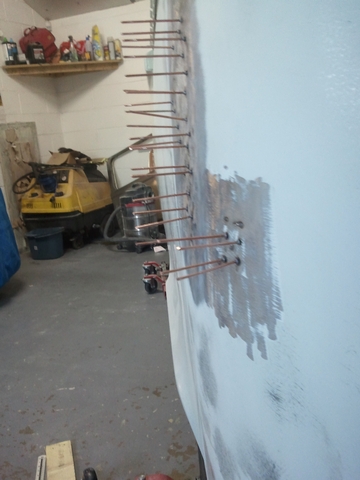 Leveled 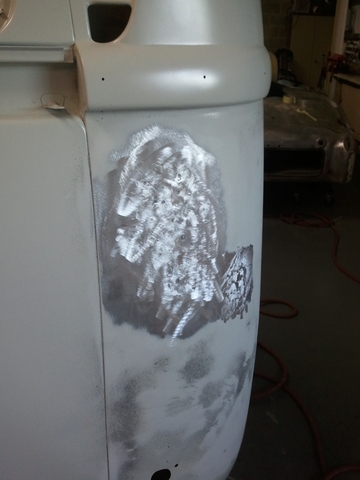 Now the worst bits. 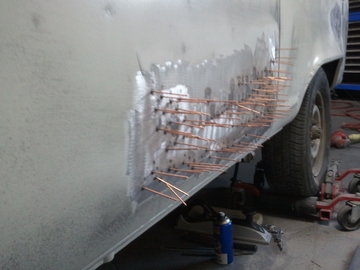 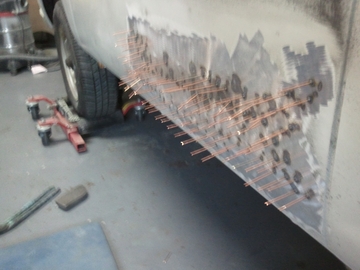 Getting there! 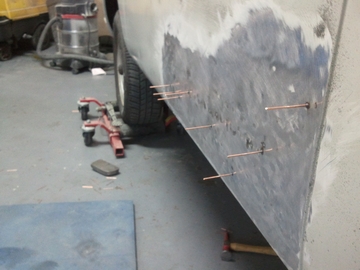 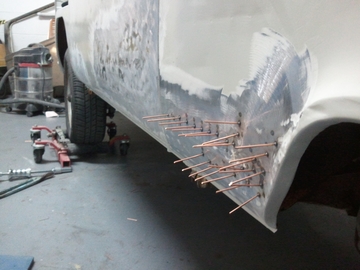 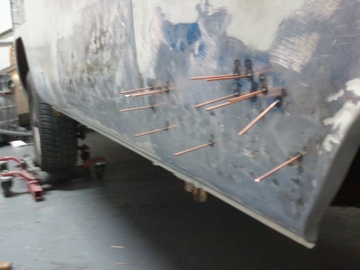 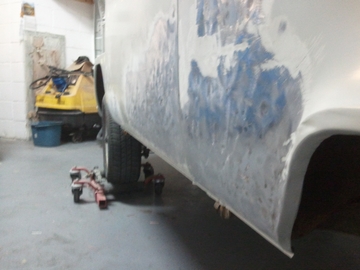 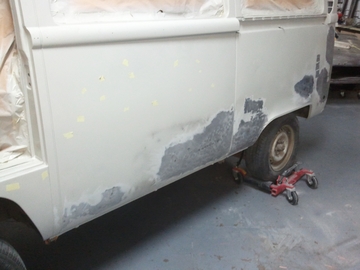 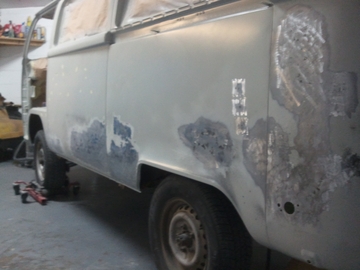 Here we are leveling out the minor dents and ripples 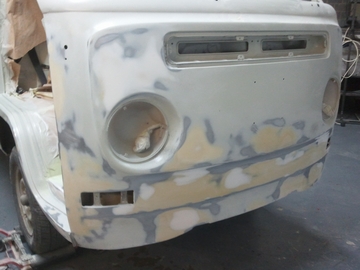 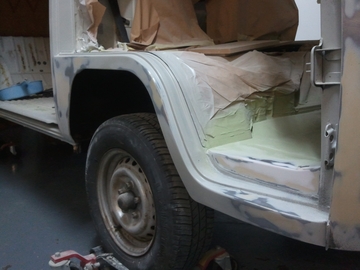 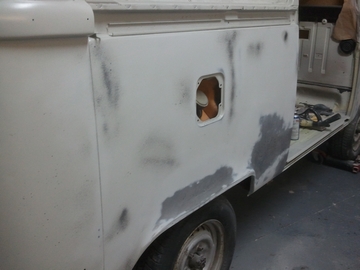 Here again the guide coat has showed up minor ripples and dents which are easily missed as they are so small but show terribly when painted glossy. 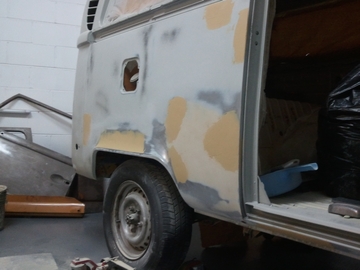 These four holes are to be welded up as the doors had hideous truck mirrors on. 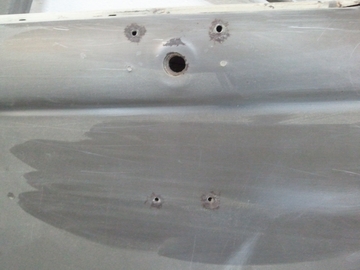 After 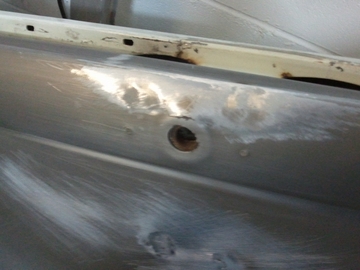 Sliding door With rot around the window frame Welded up and finished 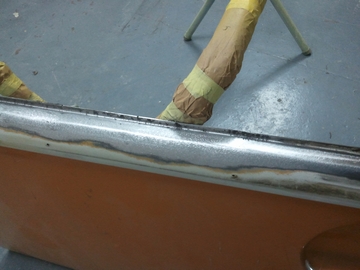 Filler cap blasted to remove rust. This was a test piece for our new blaster 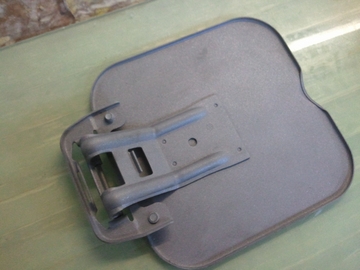 Panels all phosphated,Baked and epoxied and Baked again. 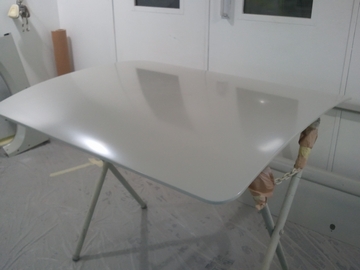 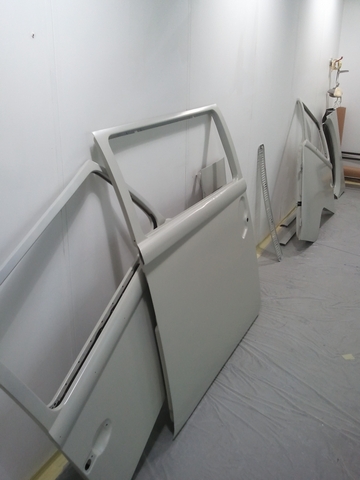 Dash epoxied 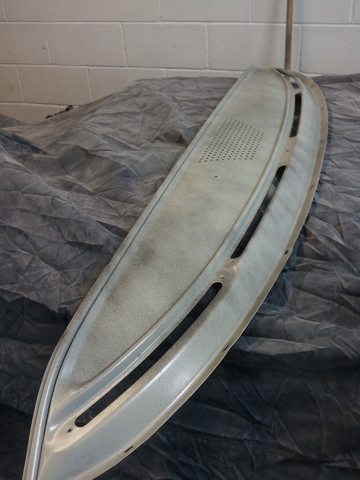 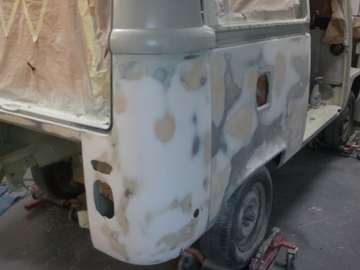 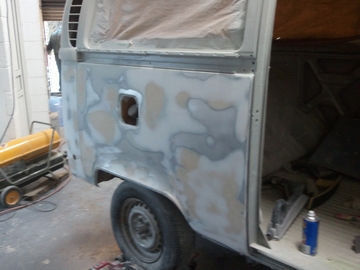 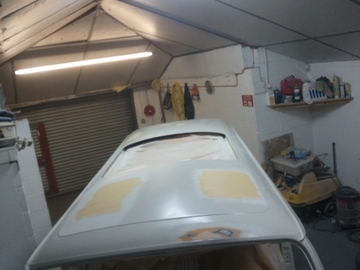  Roof was surprisingly ripply. 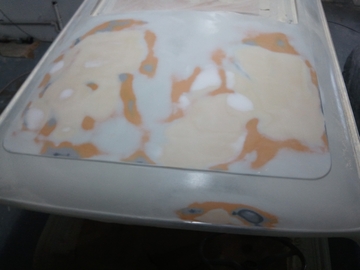 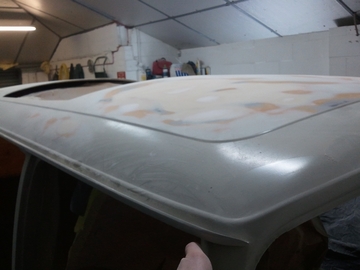 Many dents in the roof 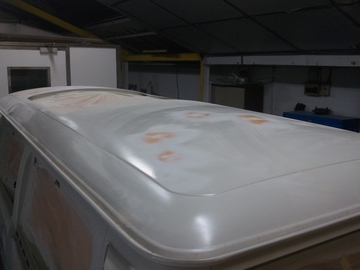 As we like to chase perfection we leveled the floor where the deep pitty marks were from corrosion 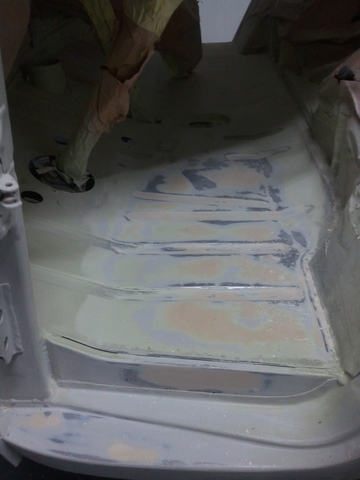 All crash damage dents and ripples leveled! 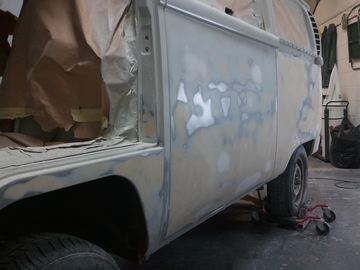 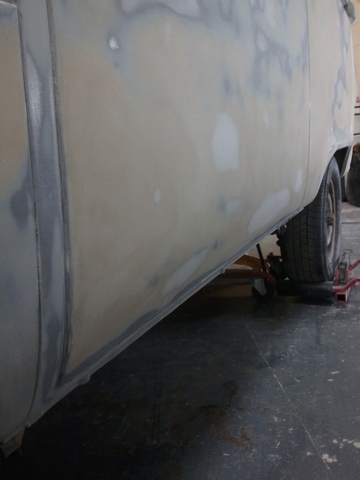 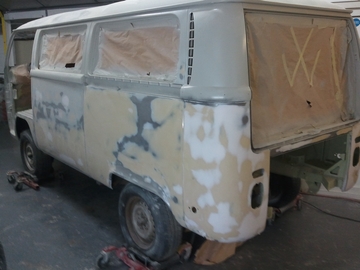 This was the most time consuming part as the rear end has had bad previous damage/repairs 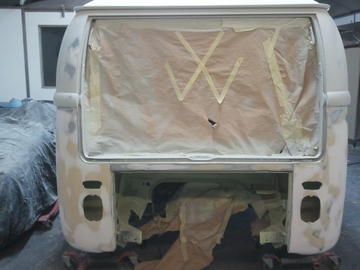 Again the inside we filled so it looks slightly more original 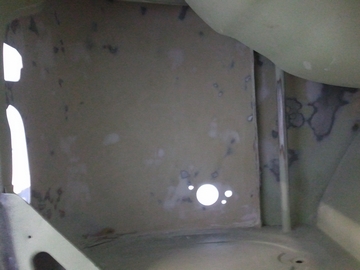  Tank cover tinted and lacquered to near original colour 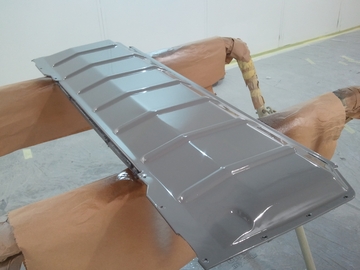 Ready to be rolled in the booth for a 15 min bake at 70 degrees to loose any moisture before coating 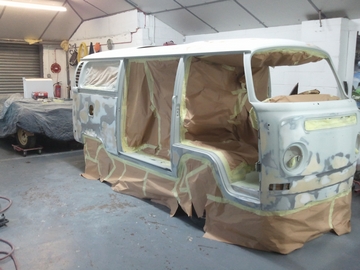 A coat of epoxy again followed with a 2k primer/surfacer 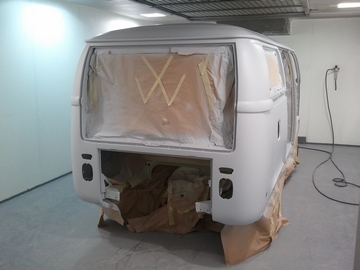 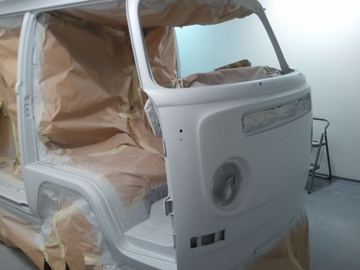 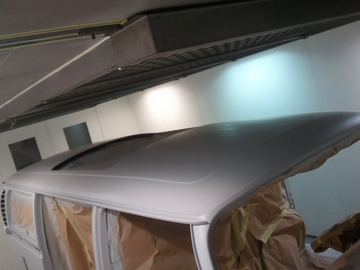 The floor and step we welded and repaired 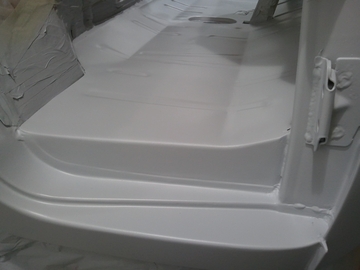 This is the side we repaired 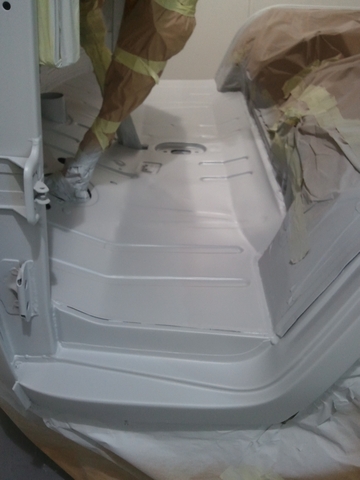 Looking straight! 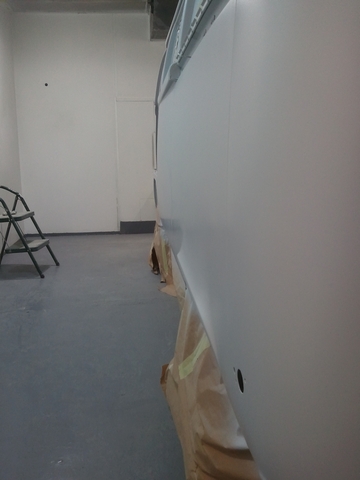 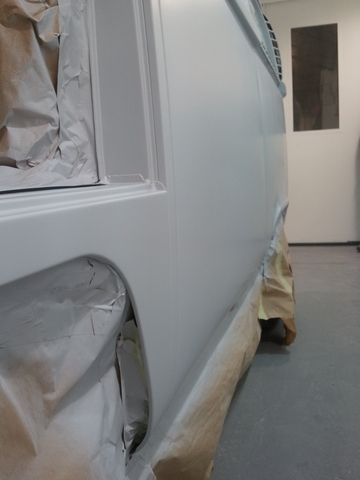 An even guide coat 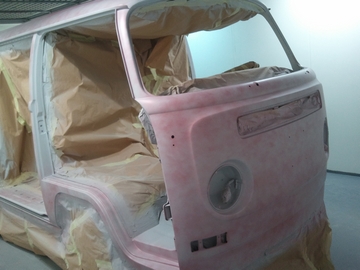 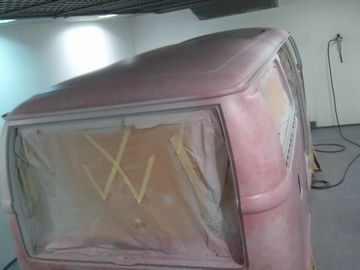 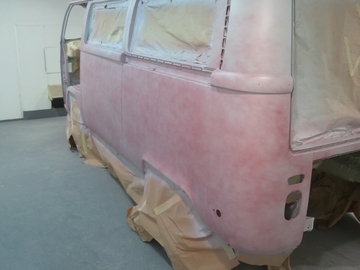 From this -> To this !!! Block Sanding Started! 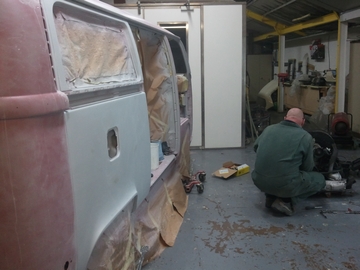 Floor edges seam sealed 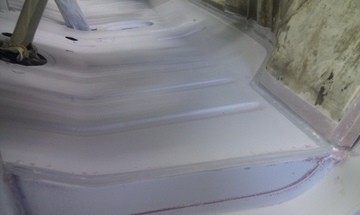 The moon vents and tailgate hinges were painted first as they're intricate and can be masked off or pushed in leaving the outside body to be concentrated on. 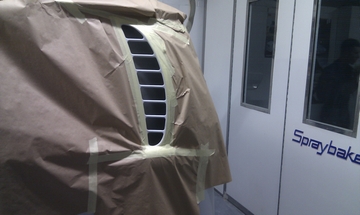 Engine bay sanded and seam sealed  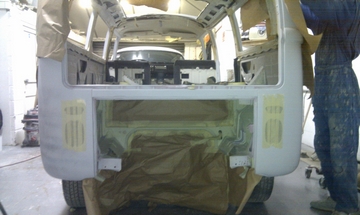 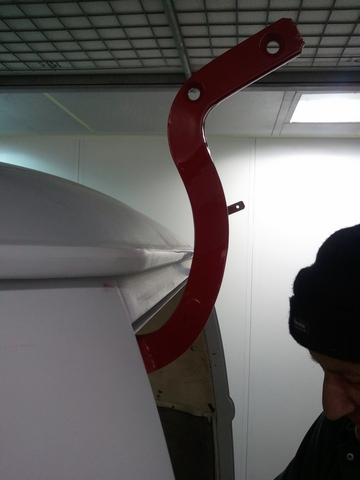 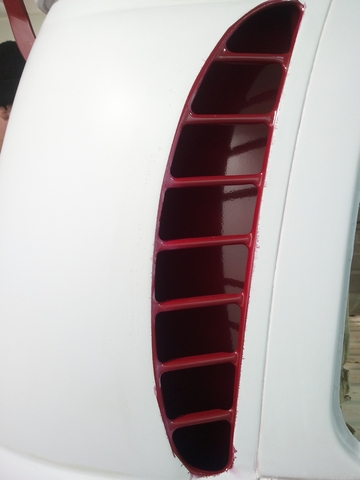 Cab floor painted in the original pastel white 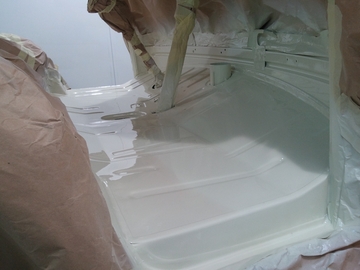 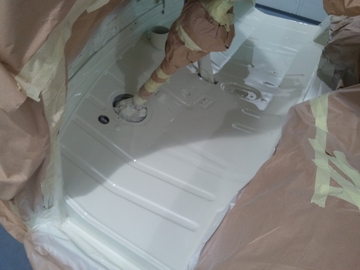 Although the cargo floor is covered we replaced the rot and painted the repair in pastel white to give further protection. 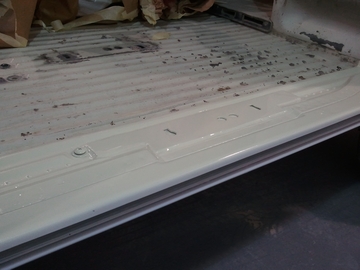 Engine compartment painted and baked. 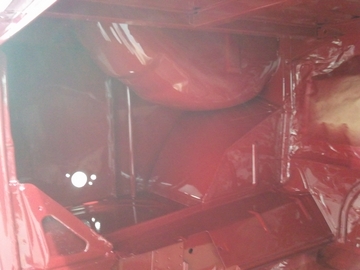 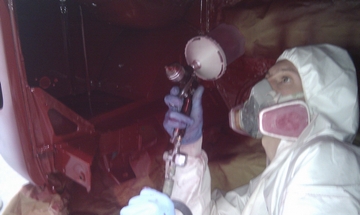 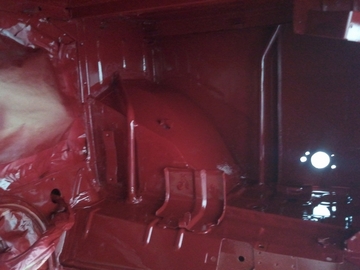 Whilst talking to the customer we decided it was best to paint the floor here as some of it maybe seen under the upholstery and the spare wheel compartment was badly rusted so we carefully sandblasted it and treated it to a chemical etch before paint, removed any previous glue and flatted the original paint. 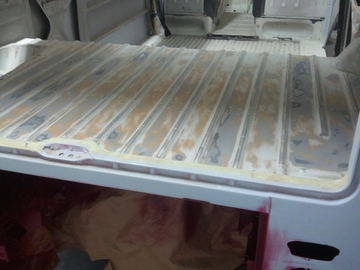 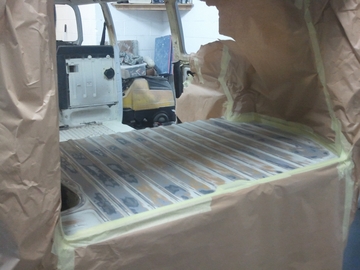 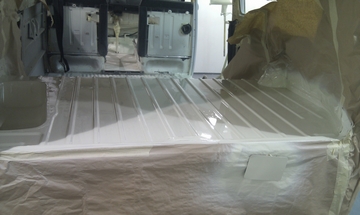 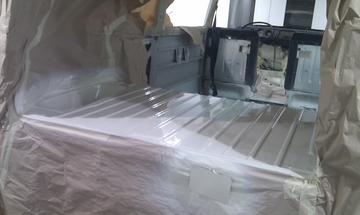 Primered Shell waiting to be pushed into the booth baked, painted and baked again! 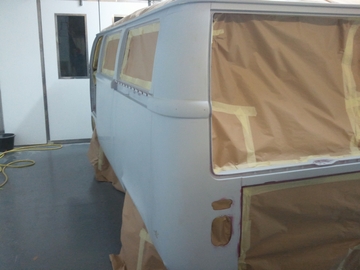 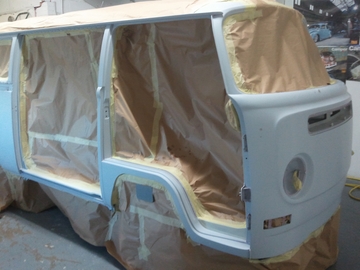 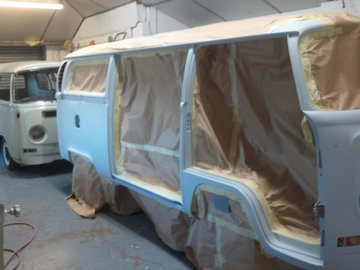 All seams sealed for the perfect smooth depth and so the paint doesn't crack in the future  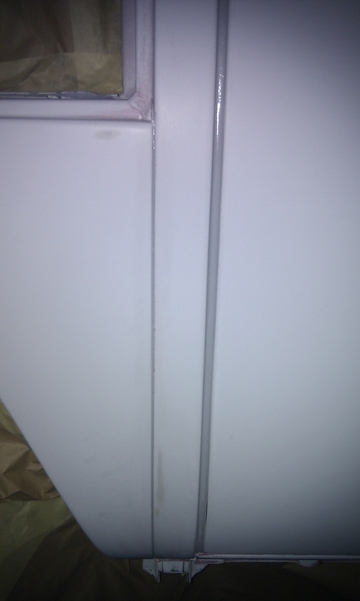 6 wet coats of chianti red  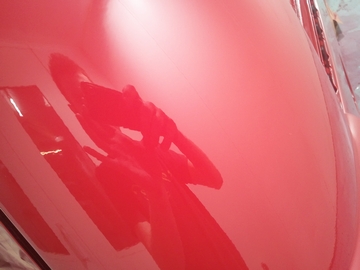  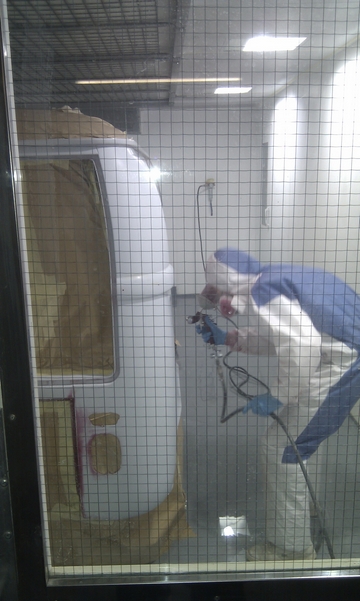 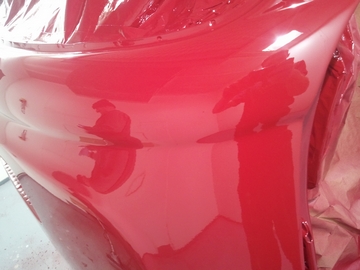  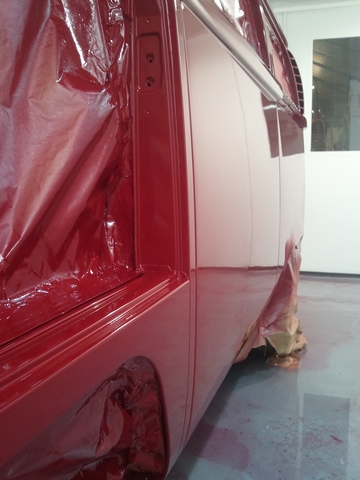  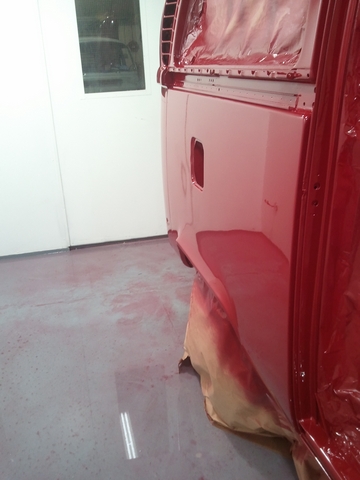  The seams look perfect this way!  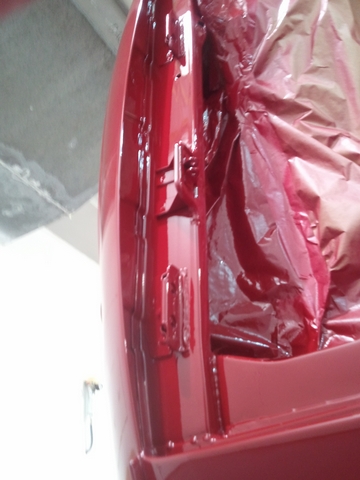 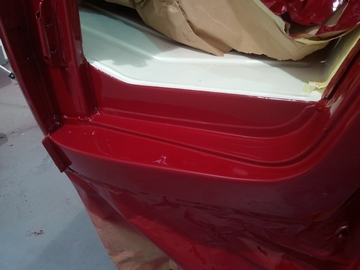 Lined out & Masked off for the cloud white roof 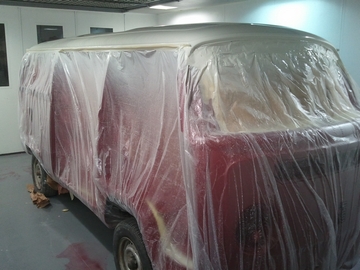 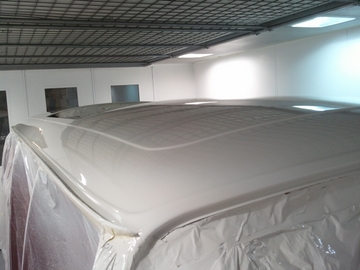  Unmasked & baked  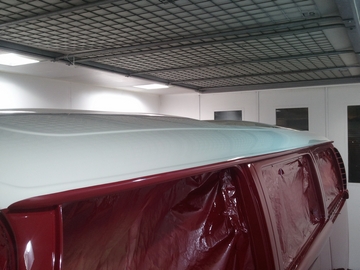 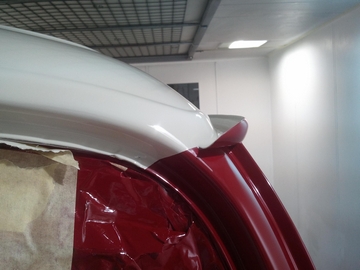 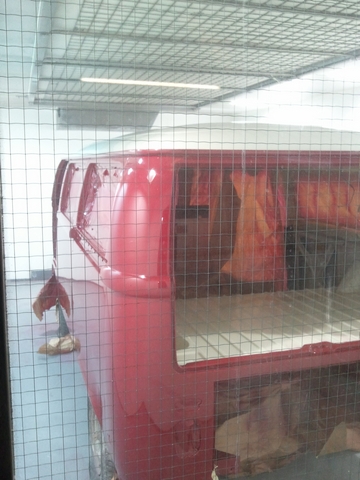      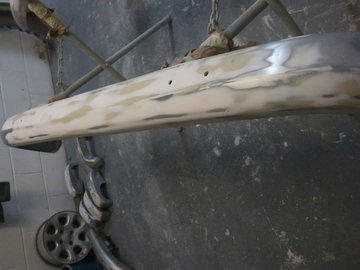 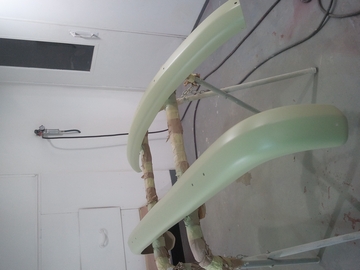 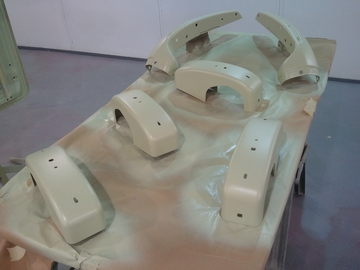 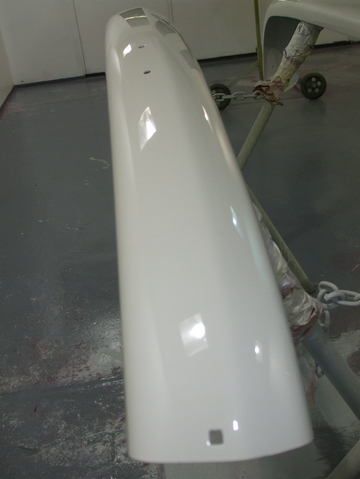 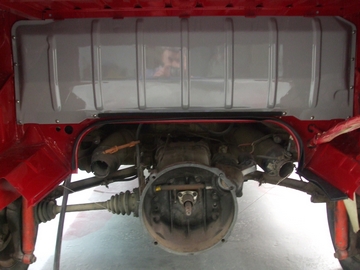 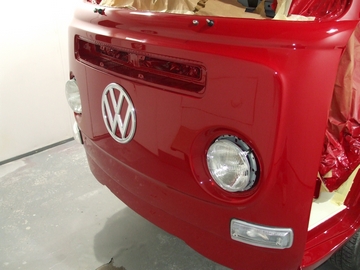 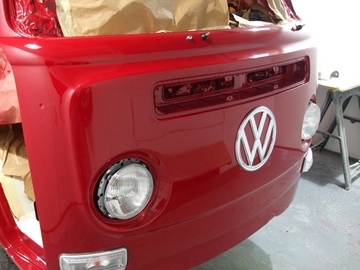 This photo was taken facing the painted panel to show the depth as you can see the reflection of the posters on our wall which are around 4ft away from the vehicle in normal workshop lighting. 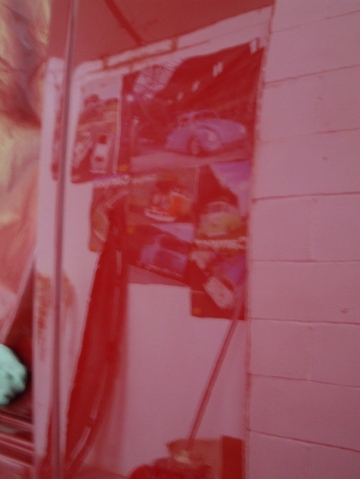 Front Bumper built up and Ready to slide on. 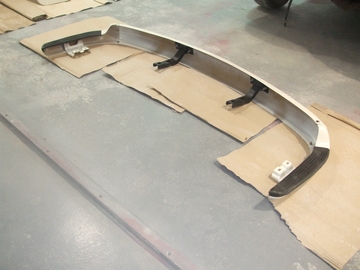 Low spots highlighted in the door. 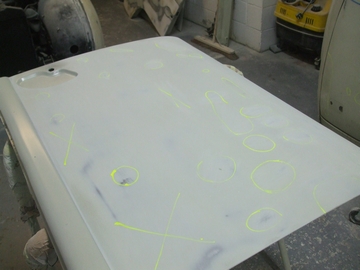 All panels Baked Primered and baked again. 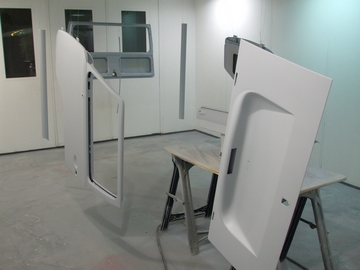 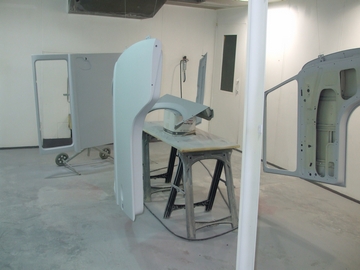 The panels were then block sanded and painted in body colour and baked again. 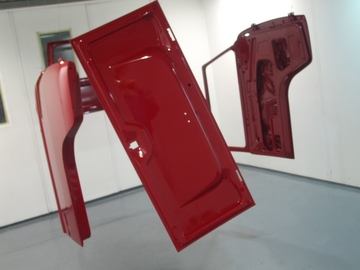 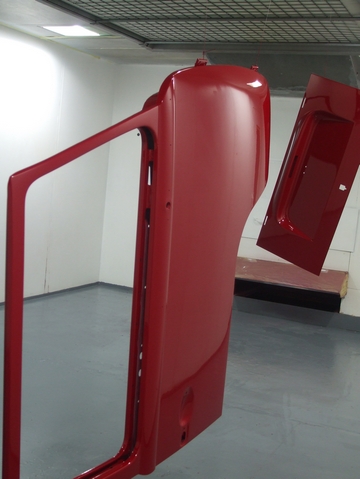 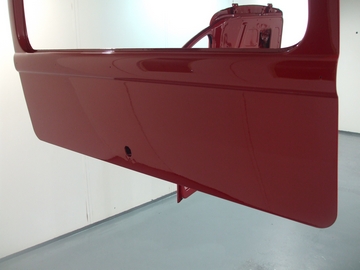 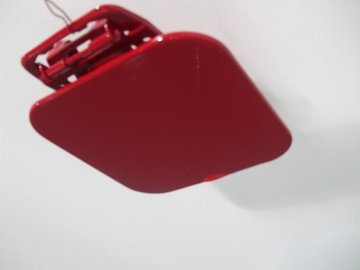 Heater chanels prepped and pinted in the cab colour. 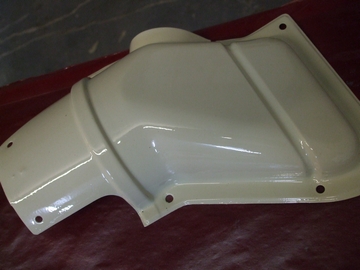 Dash painted satin black  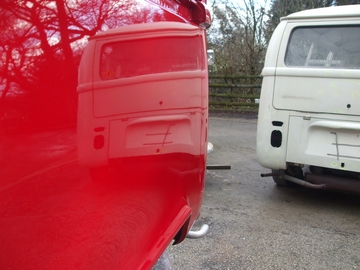 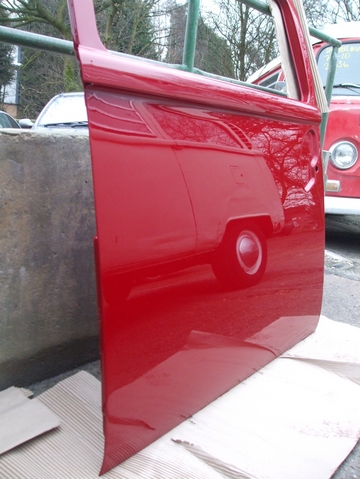 Chanels fitted, pedals painted and fitted with new rubbers. 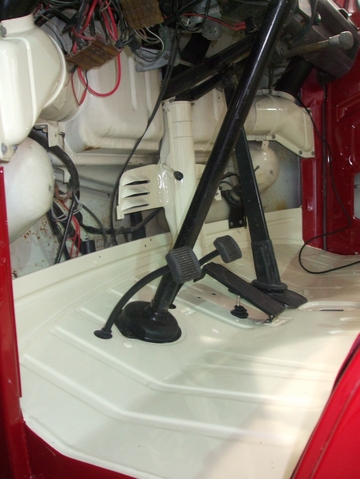 Track covers fitted, doors fitted, window scrapers fitted, glass fitted,Deluxe trim fitted and mirrors fitted. 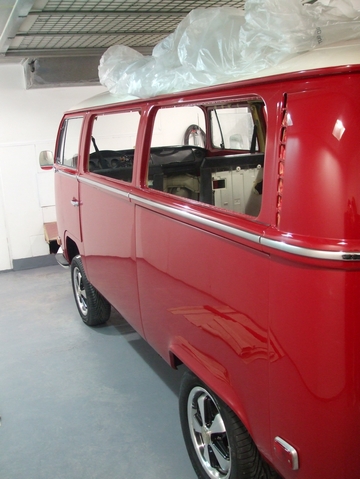 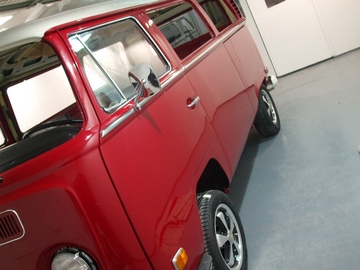 Rear bumper built and fitted, locks fitted. 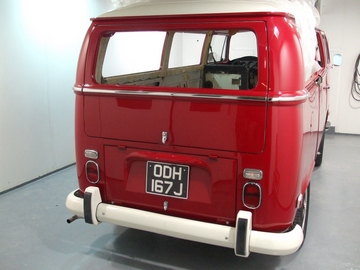     The first outing and the first trophy!
|
||
Comments ( 16 ) - Add Your Comment
|
||
This looks great, how many hours does it take for something like this?
by Sander on 20 October 2010 0:46 |


Looking good guys
by Midland Early Bay on 2 November 2010 15:9
This looks great guys.. I`m looking at a similar project for my `79 bay. Will email for quotes!
by Tom on 3 November 2010 20:27
Wow, this looks like perfection, just what i`am looking for.
by Carl on 16 January 2011 9:16
looking good stuart/drew,makes me feel totally relaxed leaving you to do me van.
great stuff!!
by mark on 28 January 2011 18:48 great stuff!!
Yay! Look at what you`ve done to our bus!
It looks fantastic,all the hard work you have done. So looking forward to seeing it..
by Mr Brightside's front seat passenger on 28 January 2011 22:58 It looks fantastic,all the hard work you have done. So looking forward to seeing it..
Wow, that looks stunning!
by Leon on 29 January 2011 15:21
Incredible! cant wait to see it doing the school run!
by Huffy on 29 January 2011 21:16
Top work Drew & Stuart, looking fantastic
by Midland Early Bay on 30 January 2011 6:22
Another fine job. Looking good Mr Brightside.
by Si & Hannah (Daffy the 72 westy) on 30 January 2011 9:54
that is incredible. im seriously thinking about shipping my van over to you for work. theres no one here in N.Ireland that can restore VWs.
beautiful work
by Johnny @ earlybay.com on 1 February 2011 11:55 beautiful work
Wow......I can see what you mean, could not resist a peak. Quite simply BEAUTIFUL!
by lou on 4 February 2011 21:9
wow paint depth is that good i can see myself, and i`m in Newcastle!
by Huffy on 7 February 2011 23:8
WOW, you have laid that clear like glass. If you dont mind my asking... what pressure are you shooting the devilbiss at? I cant get a finish at the reccomended pressure (2bar) Im having to crank it up to nearer 60psi to get a nicer finish, but it eats a lot of paint. Keep up the amazing work.
Craig
by Craig on 10 March 2012 9:46 Craig
Hola! I`ve been following your blog for a while now and finally got the bravery to go ahead and give you a shout out from Atascocita Tx! Just wanted to tell you keep up the great work!
costume homme mariage http://www.fnath.org/nouveau-bandeau/Costume-Homme.php?a_id=17148
by costume homme mariage on 15 May 2014 15:51 costume homme mariage http://www.fnath.org/nouveau-bandeau/Costume-Homme.php?a_id=17148


